Tag: heatmap

Beating Battleships with Algorithms and AI

Past days, I discovered this series of blogs on how to win the classic game of Battleships (gameplay explanation) using different algorithmic approaches. I thought they might amuse you as well : )

The story starts with this 2012 Datagenetics blog where Nick Berry constrasts four algorithms’ performance in the game of Battleships. The resulting levels of artificial intelligence (AI) seem to compare respectively to a distracted baby, two sensible adults, and a mathematical progidy.

The first, stupidest approach is to just take Random shots. The AI resulting from such an algorithm would just pick a random tile to shoot at each turn. Nick simulated 100 million games with this random apporach and computed that the algorithm would require 96 turns to win 50% of games, given that it would not be defeated before that time. At best, the expertise level of this AI would be comparable to that of a distracted baby. Basically, it would lose from the average toddler, given that the toddler would survive the boredom of playing such a stupid AI.

A first major improvement results in what is dubbed the Hunt algorithm. This improved algorithm includes an instruction to explore nearby spaces whenever a prior shot hit. Every human who has every played Battleships will do this intuitively. A great improvement indeed as Nick’s simulations demonstrated that this Hunt algorithm completes 50% of games within ~65 turns, as long as it is not defeated beforehand. Your little toddler nephew will certainly lose, and you might experience some difficulty as well from time to time.

A visual representation of the “Hunting” of the algorithm on a hit [via]

Another minor improvement comes from adding the so-called Parity principle to this Hunt algorithm (i.e., Nick’s Hunt + Parity algorithm). This principle instructs the algorithm to take into account that ships will always cover odd as well as even numbered tiles on the board. This information can be taken into account to provide for some more sensible shooting options. For instance, in the below visual, you should avoid shooting the upper left white tile when you have already shot its blue neighbors. You might have intuitively applied this tactic yourself in the past, shooting tiles in a “checkboard” formation. With the parity principle incorporated, the median completion rate of our algorithm improves to ~62 turns, Nick’s simulations showed.

The Parity “checkerboard” principle [via]

Now, Nick’s final proposed algorithm is much more computationally intensive. It makes use of Probability Density Functions. At the start of every turn, it works out all possible locations that every remaining ship could fit in. As you can imagine, many different combinations are possible with five ships. These different combinations are all added up, and every tile on the board is thus assigned a probability that it includes a ship part, based on the tiles that are already uncovered.

Computing the probability that a tile contains a ship based on all possible board layouts [via]

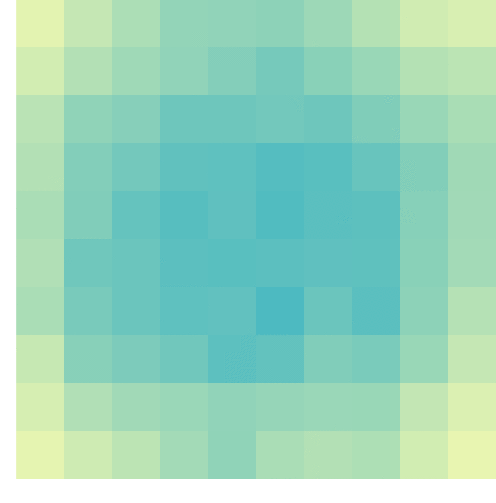
At the start of the game, no tiles are uncovered, so all spaces will have about the same likelihood to contain a ship. However, as more and more shots are fired, some locations become less likely, some become impossible, and some become near certain to contain a ship. For instance, the below visual reflects seven misses by the X’s and the darker tiles which thus have a relatively high probability of containing a ship part. 

An example distribution with seven misses on the grid. [via]

Nick simulated 100 million games of Battleship for this probabilistic apporach as well as the prior algorithms. The below graph summarizes the results, and highlight that this new probabilistic algorithm greatly outperforms the simpler approaches. It completes 50% of games within ~42 turns! This algorithm will have you crying at the boardgame table.

Relative performance of the algorithms in the Datagenetics blog, where “New Algorithm” refers to the probabilistic approach and “No Parity” refers to the original “Hunt” approach.

Reddit user /u/DataSnaek reworked this probablistic algorithm in Python and turned its inner calculations into a neat GIF. Below, on the left, you see the probability of each square containing a ship part. The brighter the color (white <- yellow <- red <- black), the more likely a ship resides at that location. It takes into account that ships occupy multiple consecutive spots. On the right, every turn the algorithm shoots the space with the highest probability. Blue is unknown, misses are in red, sunk ships in brownish, hit “unsunk” ships in light blue (sorry, I am terribly color blind).


The probability matrix as a heatmap for every square after each move in the game.  [via]

This latter attempt by DataSnaek was inspired by Jonathan Landy‘s attempt to train a reinforcement learning (RL) algorithm to win at Battleships. Although the associated GitHub repository doesn’t go into much detail, the approach is elaborately explained in this blog. However, it seems that this specific code concerns the training of a neural network to perform well on a very small Battleships board, seemingly containing only a single ship of size 3 on a board with only a single row of 10 tiles.

Fortunately, Sue He wrote about her reinforcement learning approach to Battleships in 2017. Building on the open source phoenix-battleship project, she created a Battleship app on Heroku, and asked co-workers to play. This produced data on 83 real, two-person games, showing, for instance, that Sue’s coworkers often tried to hide their size 2 ships in the corners of the Battleships board.

Probability heatmaps of ship placement in Sue He’s reinforcement learning Battleships project [via]

Next, Sue scripted a reinforcement learning agent in PyTorch to train and learn where to shoot effectively on the 10 by 10 board. It became effective quite quickly, requiring only 52 turns (on average over the past 25 games) to win, after training for only a couple hundreds games.

The performance of the RL agent at Battleships during the training process [via]

However, as Sue herself notes in her blog, disappointly, this RL agent still does not outperform the probabilistic approach presented earlier in this current blog.

Reddit user /u/christawful faced similar issues. Christ (I presume he is called) trained a convolutional neural network (CNN) with the below architecture on a dataset of Battleships boards. Based on the current board state (10 tiles * 10 tiles * 3 options [miss/hit/unknown]) as input data, the intermediate convolutional layers result in a final output layer containing 100 values (10 * 10) depicting the probabilities for each tile to result in a hit. Again, the algorithm can simply shoot the tile with the highest probability.

NN diagram
Christ’s convolutional neural network architecture for Battleships [via]

Christ was nice enough to include GIFs of the process as well [via]. The first GIF shows the current state of the board as it is input in the CNN — purple represents unknown tiles, black a hit, and white a miss (i.e., sea). The next GIF represent the calculated probabilities for each tile to contain a ship part — the darker the color the more likely it contains a ship. Finally, the third picture reflects the actual board, with ship pieces in black and sea (i.e., miss) as white.

As cool as this novel approach was, Chris ran into the same issue as Sue, his approach did not perform better than the purely probablistic one. The below graph demonstrates that while Christ’s CNN (“My Algorithm”) performed quite well — finishing a simulated 9000 games in a median of 52 turns — it did not outperform the original probabilistic approach of Nick Berry — which came in at 42 turns. Nevertheless, Chris claims to have programmed this CNN in a couple of hours, so very well done still.

cdf
The performance of Christ’s Battleship CNN compared to Nick Berry’s original algorithms [via]

Interested by all the above, I searched the web quite a while for any potential improvement or other algorithmic approaches. Unfortunately, in vain, as I did not find a better attempt than that early 2012 Datagenics probability algorithm by Nick.

Surely, with today’s mass cloud computing power, someone must be able to train a deep reinforcement learner to become the Battleship master? It’s not all probability right, there must be some patterns in generic playing styles, like Sue found among her colleagues. Or maybe even the ability of an algorithm to adapt to the opponent’s playin style, as we see in Libratus, the poker AI. Maybe the guys at AlphaGo could give it a shot?

For starters, Christ’s provided some interesting improvements on his CNN approach. Moreover, while the probabilistic approach seems the best performing, it might not the most computationally efficient. All in all, I am curious to see whether this story will continue.

Join 1,403 other followers
Tidy Missing Data Handling

Tidy Missing Data Handling

A recent open access paper by Nicholas Tierney and Dianne Cook — professors at Monash University — deals with simpler handling, exploring, and imputation of missing values in data.They present new methodology building upon tidy data principles, with a goal to integrating missing value handling as an integral part of data analysis workflows. New data structures are defined (like the nabular) along with new functions to perform common operations (like gg_miss_case).

These new methods have bundled among others in the R packages naniar and visdat, which I highly recommend you check out. To put in the author’s own words:

The naniar and visdat packages build on existing tidy tools and strike a compromise between automation and control that makes analysis efficient, readable, but not overly complex. Each tool has clear intent and effects – plotting or generating data or augmenting data in some way. This reduces repetition and typing for the user, making exploration of missing values easier as they follow consistent rules with a declarative interface.

The below showcases some of the highly informational visuals you can easily generate with naniar‘s nabulars and the associated functionalities.

For instance, these heatmap visualizations of missing data for the airquality dataset. (A) represents the default output and (B) is ordered by clustering on rows and columns. You can see there are only missings in ozone and solar radiation, and there appears to be some structure to their missingness.

a.JPG

Another example is this upset plot of the patterns of missingness in the airquality dataset. Only Ozone and Solar.R have missing values, and Ozone has the most missing values. There are 2 cases where both Solar.R and Ozone have missing values.b.JPG

You can also generate a histogram using nabular data in order to show the values and missings in Ozone. Values are imputed below the range to show the number of missings in Ozone and colored according to missingness of ozone (‘Ozone_NA‘). This displays directly that there are approximately 35-40 missings in Ozone.

c.JPGAlternatively, scatterplots can be easily generated. Displaying missings at 10 percent below the minimum of the airquality dataset. Scatterplots of ozone and solar radiation (A), and ozone and temperature (B). These plots demonstrate that there are missings in ozone and solar radiation, but not in temperature.d.JPG

Finally, this parallel coordinate plot displays the missing values imputed 10% below range for the oceanbuoys dataset. Values are colored by missingness of humidity. Humidity is missing for low air and sea temperatures, and is missing for one year and one location.

e.JPG

Please do check out the original open access paper and the CRAN vignettes associated with the packages!


The Dataviz Project: Find just the right visualization

The Dataviz Project: Find just the right visualization

Do you have a bunch of data but you can’t seem to figure out how to display it? Or looking for that one specific visualization of which you can’t remember the name?

www.datavizproject.com provides a most comprehensive overview of all the different ways to visualize your data. You can sort all options by Family, Input, Function, and Shape to find that one dataviz that best conveys your message.

datavizproject overview

Update: look at some of these other repositories here or here.

Short ggplot2 tutorial by MiniMaxir

Short ggplot2 tutorial by MiniMaxir

The following was reposted from minimaxir.com


QUICK INTRODUCTION TO GGPLOT2

ggplot2 uses a more concise setup toward creating charts as opposed to the more declarative style of Python’s matplotlib and base R. And it also includes a few example datasets for practicing ggplot2 functionality; for example, the mpg dataset is a dataset of the performance of popular models of cars in 1998 and 2008.

Let’s say you want to create a scatter plot. Following a great example from the ggplot2 documentation, let’s plot the highway mileage of the car vs. the volume displacement of the engine. In ggplot2, first you instantiate the chart with the ggplot() function, specifying the source dataset and the core aesthetics you want to plot, such as x, y, color, and fill. In this case, we set the core aesthetics to x = displacement and y = mileage, and add a geom_point() layer to make a scatter plot:

p <- ggplot(mpg, aes(x = displ, y = hwy)) +
            geom_point()

As we can see, there is a negative correlation between the two metrics. I’m sure you’ve seen plots like these around the internet before. But with only a couple of lines of codes, you can make them look more contemporary.

ggplot2 lets you add a well-designed theme with just one line of code. Relatively new to ggplot2 is theme_minimal(), which generates a muted style similar to FiveThirtyEight’s modern data visualizations:

p <- p +
    theme_minimal()

But we can still add color. Setting a color aesthetic on a character/categorical variable will set the colors of the corresponding points, making it easy to differentiate at a glance.

p <- ggplot(mpg, aes(x = displ, y = hwy, color=class)) +
            geom_point() +
            theme_minimal()

Adding the color aesthetic certainly makes things much prettier. ggplot2 automatically adds a legend for the colors as well. However, for this particular visualization, it is difficult to see trends in the points for each class. A easy way around this is to add a least squares regression trendline for each class using geom_smooth() (which normally adds a smoothed line, but since there isn’t a lot of data for each group, we force it to a linear model and do not plot confidence intervals)

p <- p +
    geom_smooth(method = "lm", se = F)

Pretty neat, and now comparative trends are much more apparent! For example, pickups and SUVs have similar efficiency, which makes intuitive sense.

The chart axes should be labeled (always label your charts!). All the typical labels, like titlex-axis, and y-axis can be done with the labs() function. But relatively new to ggplot2 are the subtitle and caption fields, both of do what you expect:

p <- p +
    labs(title="Efficiency of Popular Models of Cars",
         subtitle="By Class of Car",
         x="Engine Displacement (liters)",
         y="Highway Miles per Gallon",
         caption="by Max Woolf — minimaxir.com")

That’s a pretty good start. Now let’s take it to the next level.

HOW TO SAVE A GGPLOT2 CHART FOR WEB

Something surprisingly undiscussed in the field of data visualization is how to save a chart as a high quality image file. For example, with Excel charts, Microsoft officially recommends to copy the chart, paste it as an image back into Excel, then save the pasted image, without having any control over image quality and size in the browser (the real best way to save an Excel/Numbers chart as an image for a webpage is to copy/paste the chart object into a PowerPoint/Keynote slide, and export the slideas an image. This also makes it extremely easy to annotate/brand said chart beforehand in PowerPoint/Keynote).

R IDEs such as RStudio have a chart-saving UI with the typical size/filetype options. But if you save an image from this UI, the shapes and texts of the resulting image will be heavily aliased (R renders images at 72 dpi by default, which is much lower than that of modern HiDPI/Retina displays).

The data visualizations used earlier in this post were generated in-line as a part of an R Notebook, but it is surprisingly difficult to extract the generated chart as a separate file. But ggplot2 also has ggsave(), which saves the image to disk using antialiasing and makes the fonts/shapes in the chart look much better, and assumes a default dpi of 300. Saving charts using ggsave(), and adjusting the sizes of the text and geoms to compensate for the higher dpi, makes the charts look very presentable. A width of 4 and a height of 3 results in a 1200x900px image, which if posted on a blog with a content width of ~600px (like mine), will render at full resolution on HiDPI/Retina displays, or downsample appropriately otherwise. Due to modern PNG compression, the file size/bandwidth cost for using larger images is minimal.

p <- ggplot(mpg, aes(x = displ, y = hwy, color=class)) + 
    geom_smooth(method = "lm", se=F, size=0.5) +
    geom_point(size=0.5) +
    theme_minimal(base_size=9) +
    labs(title="Efficiency of Popular Models of Cars",
         subtitle="By Class of Car",
         x="Engine Displacement (liters)",
         y="Highway Miles per Gallon",
         caption="by Max Woolf — minimaxir.com")

ggsave("tutorial-0.png", p, width=4, height=3)

Compare to the previous non-ggsave chart, which is more blurry around text/shapes:

For posterity, here’s the same chart saved at 1200x900px using the RStudio image-saving UI:

Note that the antialiasing optimizations assume that you are not uploading the final chart to a service like Medium or WordPress.com, which will compress the images and reduce the quality anyways. But if you are uploading it to Reddit or self-hosting your own blog, it’s definitely worth it.

FANCY FONTS

Changing the chart font is another way to add a personal flair. Theme functions like theme_minimal()accept a base_family parameter. With that, you can specify any font family as the default instead of the base sans-serif. (On Windows, you may need to install the extrafont package first). Fonts from Google Fonts are free and work easily with ggplot2 once installed. For example, we can use Roboto, Google’s modern font which has also been getting a lot of usage on Stack Overflow’s great ggplot2 data visualizations.

p <- p +
    theme_minimal(base_size=9, base_family="Roboto")

A general text design guideline is to use fonts of different weights/widths for different hierarchies of content. In this case, we can use a bolder condensed font for the title, and deemphasize the subtitle and caption using lighter colors, all done using the theme() function.

p <- p + 
    theme(plot.subtitle = element_text(color="#666666"),
          plot.title = element_text(family="Roboto Condensed Bold"),
          plot.caption = element_text(color="#AAAAAA", size=6))

It’s worth nothing that data visualizations posted on websites should be easily legible for mobile-device users as well, hence the intentional use of larger fonts relative to charts typically produced in the desktop-oriented Excel.

Additionally, all theming options can be set as a session default at the beginning of a script using theme_set(), saving even more time instead of having to recreate the theme for each chart.

THE “GGPLOT2 COLORS”

The “ggplot2 colors” for categorical variables are infamous for being the primary indicator of a chart being made with ggplot2. But there is a science to it; ggplot2 by default selects colors using the scale_color_hue() function, which selects colors in the HSL space by changing the hue [H] between 0 and 360, keeping saturation [S] and lightness [L] constant. As a result, ggplot2 selects the most distinct colors possible while keeping lightness constant. For example, if you have 2 different categories, ggplot2 chooses the colors with h = 0 and h = 180; if 3 colors, h = 0, h = 120, h = 240, etc.

It’s smart, but does make a given chart lose distinctness when many other ggplot2 charts use the same selection methodology. A quick way to take advantage of this hue dispersion while still making the colors unique is to change the lightness; by default, l = 65, but setting it slightly lower will make the charts look more professional/Bloomberg-esque.

p_color <- p +
        scale_color_hue(l = 40)

RCOLORBREWER

Another coloring option for ggplot2 charts are the ColorBrewer palettes implemented with the RColorBrewer package, which are supported natively in ggplot2 with functions such as scale_color_brewer(). The sequential palettes like “Blues” and “Greens” do what the name implies:

p_color <- p +
        scale_color_brewer(palette="Blues")

A famous diverging palette for visualizations on /r/dataisbeautiful is the “Spectral” palette, which is a lighter rainbow (recommended for dark backgrounds)

However, while the charts look pretty, it’s difficult to tell the categories apart. The qualitative palettes fix this problem, and have more distinct possibilities than the scale_color_hue() approach mentioned earlier.

Here are 3 examples of qualitative palettes, “Set1”, “Set2”, and “Set3,” whichever fit your preference.

VIRIDIS AND ACCESSIBILITY

Let’s mix up the visualization a bit. A rarely-used-but-very-useful ggplot2 geom is geom2d_bin(), which counts the number of points in a given 2d spatial area:

p <- ggplot(mpg, aes(x = displ, y = hwy)) + 
    geom_bin2d(bins=10) +
    [...theming options...]

We see that the largest number of points are centered around (2,30). However, the default ggplot2 color palette for continuous variables is boring. Yes, we can use the RColorBrewer sequential palettes above, but as noted, they aren’t perceptually distinct, and could cause issues for readers who are colorblind.

The viridis R package provides a set of 4 high-contrast palettes which are very colorblind friendly, and works easily with ggplot2 by extending a scale_fill_viridis()/scale_color_viridis() function.

The default “viridis” palette has been increasingly popular on the web lately:

p_color <- p +
        scale_fill_viridis(option="viridis")

“magma” and “inferno” are similar, and give the data visualization a fiery edge:

Lastly, “plasma” is a mix between the 3 palettes above:

If you’ve been following my blog, I like to use R and ggplot2 for data visualization. A lot.

One of my older blog posts, An Introduction on How to Make Beautiful Charts With R and ggplot2, is still one of my most-trafficked posts years later, and even today I see techniques from that particular post incorporated into modern data visualizations on sites such as Reddit’s /r/dataisbeautiful subreddit.

NEXT STEPS

FiveThirtyEight actually uses ggplot2 for their data journalism workflow in an interesting way; they render the base chart using ggplot2, but export it as as a SVG/PDF vector file which can scale to any size, and then the design team annotates/customizes the data visualization in Adobe Illustrator before exporting it as a static PNG for the article (in general, I recommend using an external image editor to add text annotations to a data visualization because doing it manually in ggplot2 is inefficient).

For general use cases, ggplot2 has very strong defaults for beautiful data visualizations. And certainly there is a lot more you can do to make a visualization beautiful than what’s listed in this post, such as using facets and tweaking parameters of geoms for further distinction, but those are more specific to a given data visualization. In general, it takes little additional effort to make something unique with ggplot2, and the effort is well worth it. And prettier charts are more persuasive, which is a good return-on-investment.

Max Woolf (@minimaxir) is a former Apple Software QA Engineer living in San Francisco and a Carnegie Mellon University graduate. In his spare time, Max uses Python to gather data from public APIs and ggplot2 to plot plenty of pretty charts from that data. You can learn more about Max here, view his data analysis portfolio here, or view his coding portfolio here.